
Vultr and Virtio Part 2 – Creating Your Custom VM
At this point, you’ve already created your custom Windows ISO and are now ready to use it to deploy a Windows virtual machine on Vultr.
Deploy Your Windows Server
- Log in to your Vultr account
- From the Servers area, click Deploy New Server

- Choose a server location
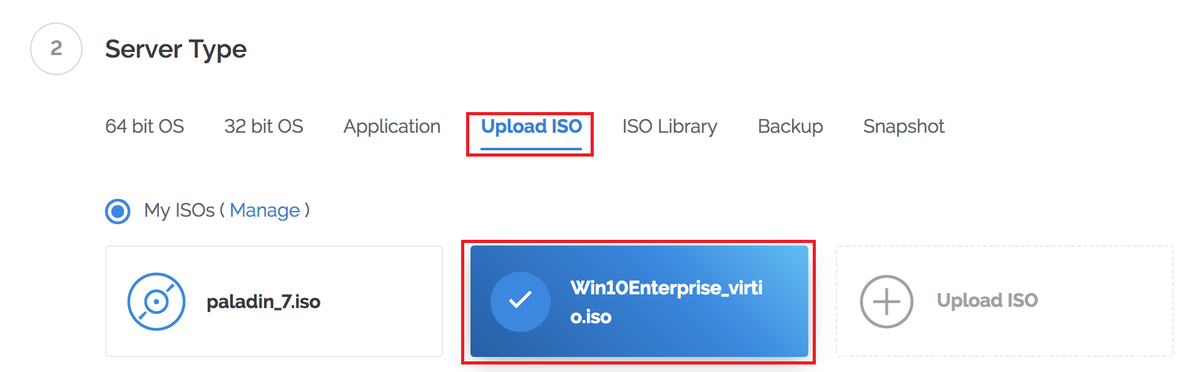
- Under Server Type, select Upload ISO, then choose the custom ISO you uploaded earlier
- Select the desired Server Size and any Additional Features as required
- Optionally provide a Server Name and Label
- Review your configuration and click Deploy Now


Install Windows
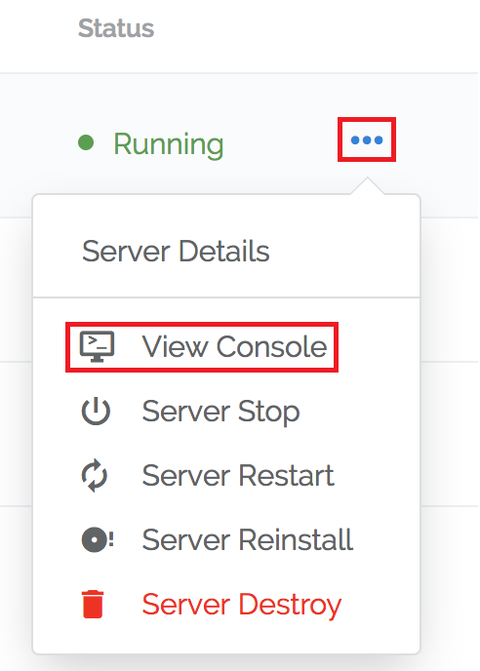
Once the server is fully deployed, click the ellipsis next to the instance and select View Console
You should be presented with the Windows installer
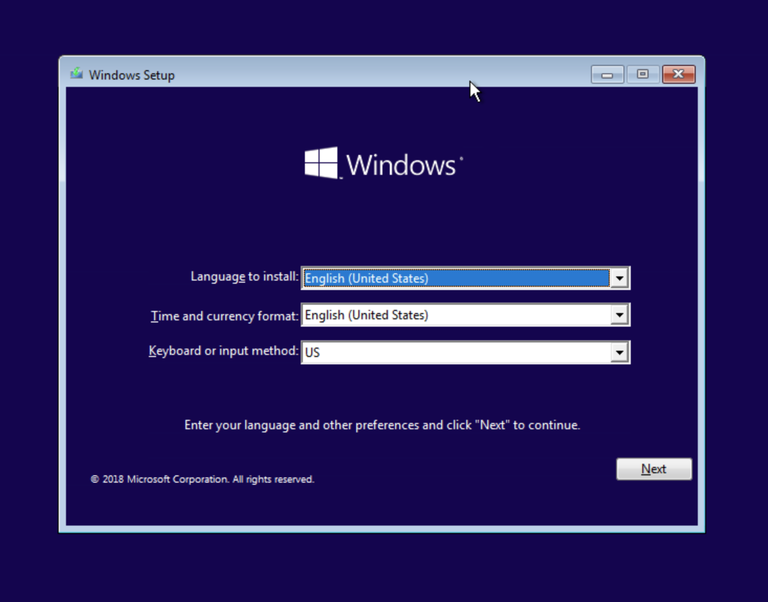
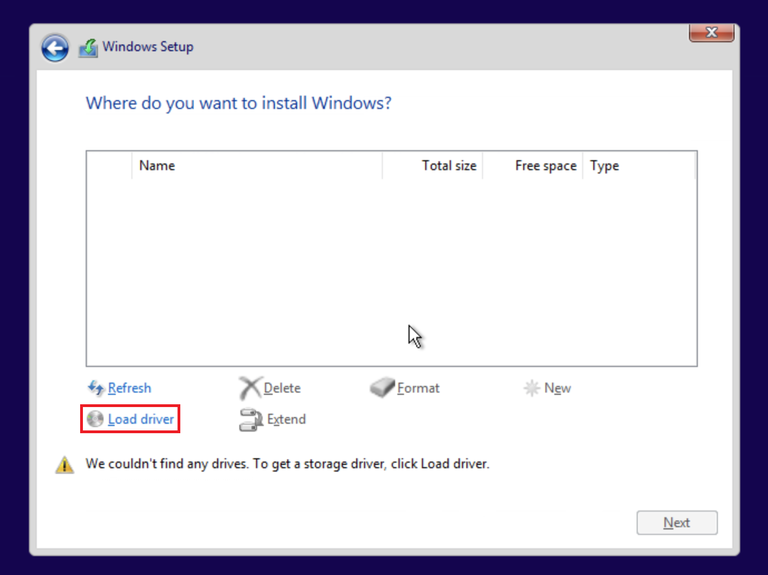
Proceed through the installer until you reach the disk selection screen.
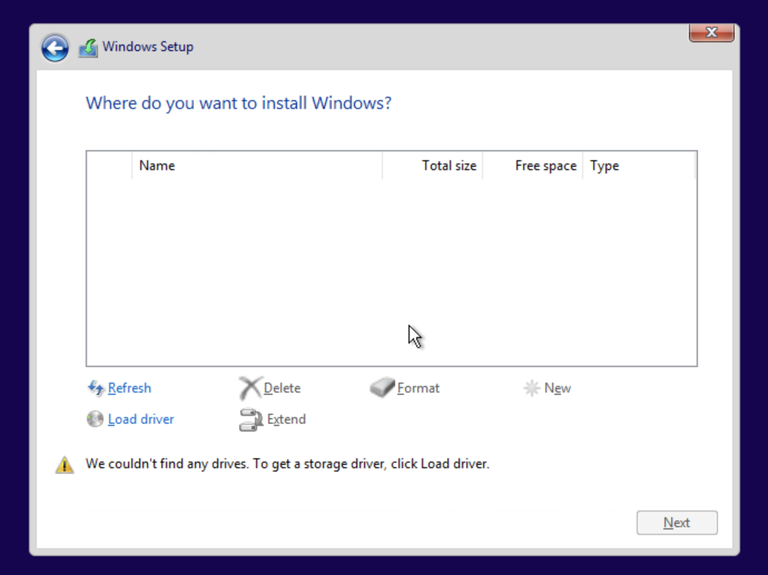
Click Load driver
Click Browse
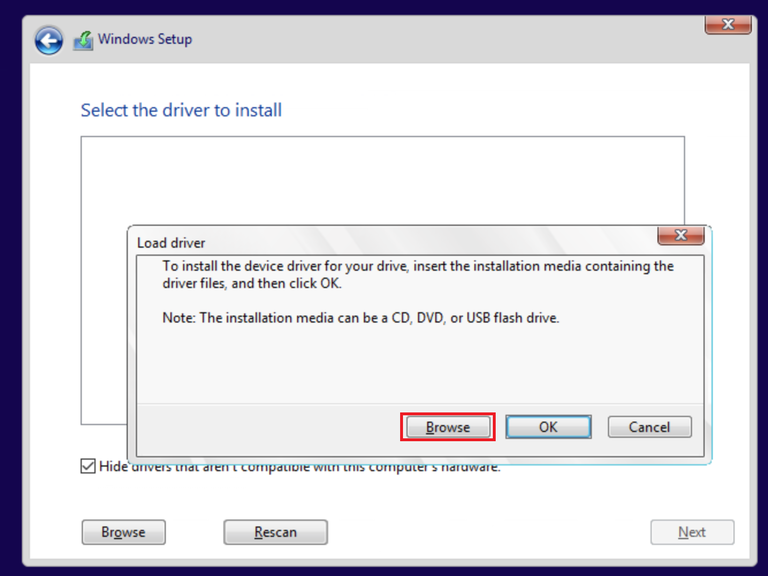
Browse to the VirtIO storage driver path on the mounted ISO: D:\virtio\viostor<winver>\amd64
Replace <winver> with the appropriate Windows version (for example w10 for Windows 10 or 2k2012r2 for Windows Server 2012 R2).
Select the driver when it appears
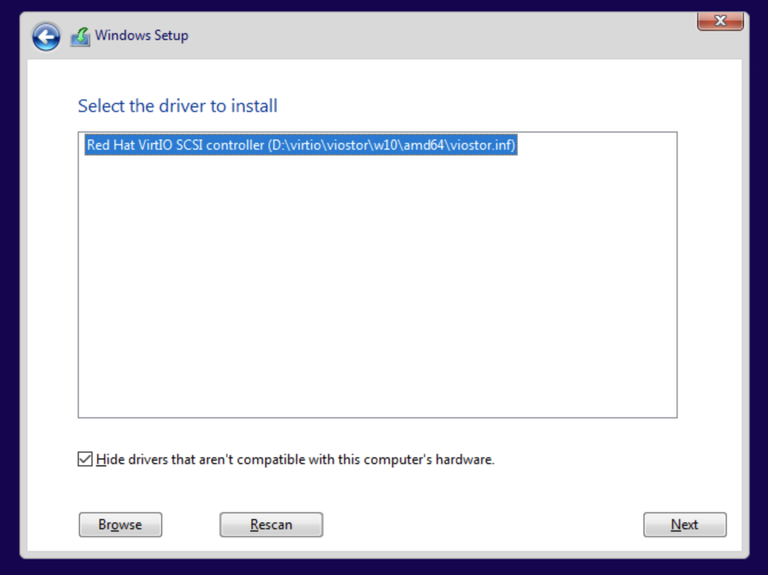
Click Next, the virtual disk should now be visible
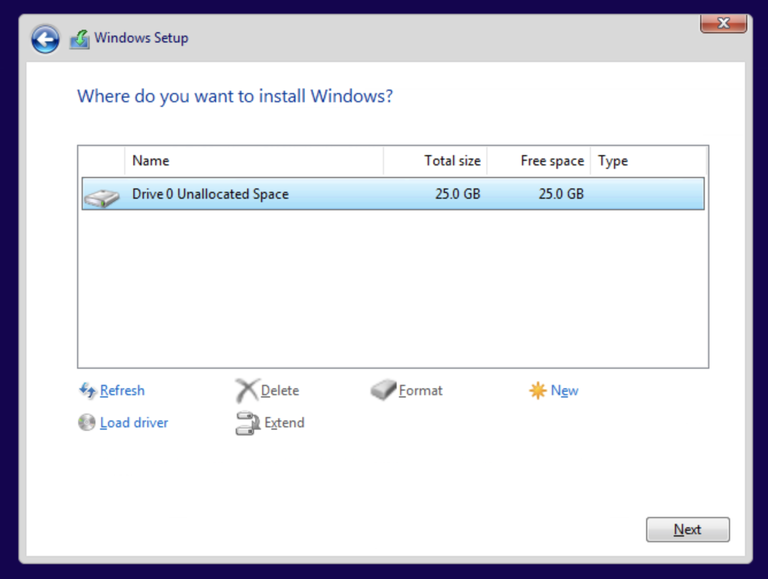
Partition and format the disk as required, then continue the Windows installation.


The Windows installer will now complete.
Post-Installation
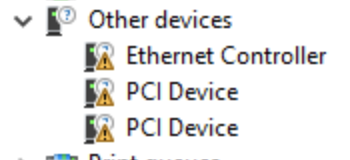
Once Windows is installed, additional VirtIO drivers may still need to be installed, particularly for networking.
- Open **Device Manager **
- Identify any devices marked with a yellow exclamation icon under Other devices
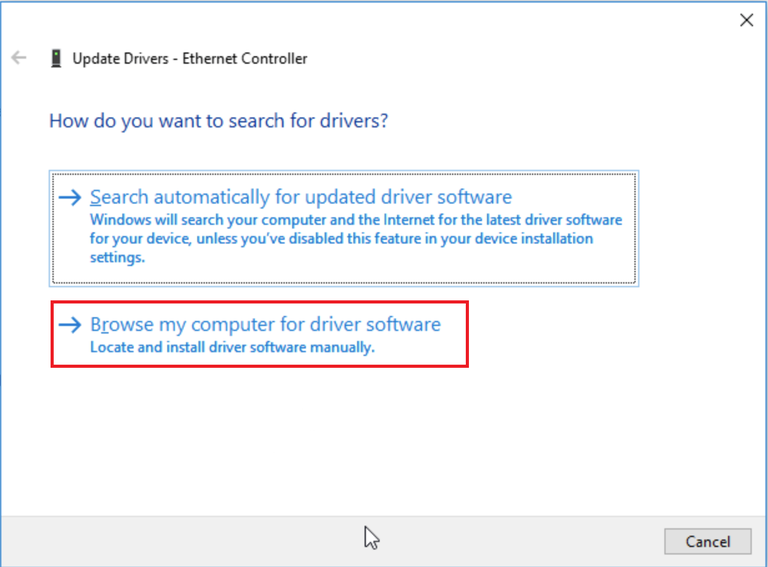
- Right-click a device and select Update Driver
- Choose Browse my computer for drivers
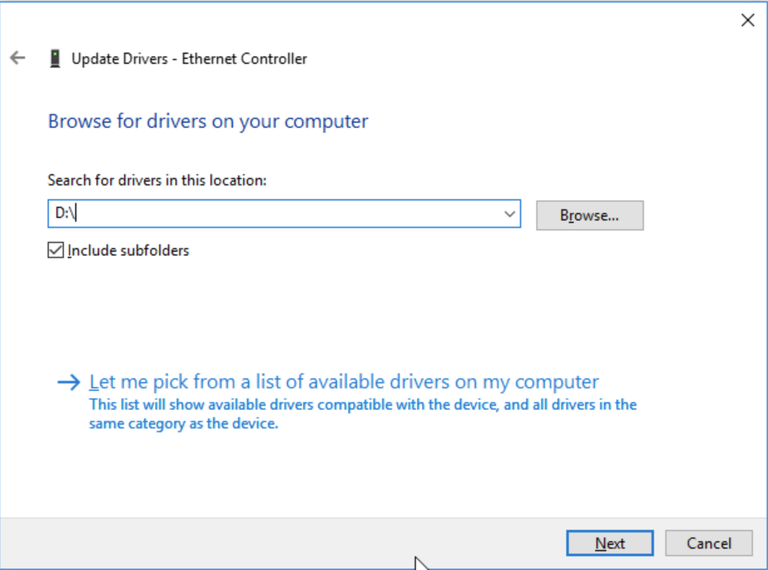
- Select the CD-ROM drive containing the ISO and ensure Include subfolders is enabled
- Repeat this process for each remaining device as required


Once all necessary drivers are installed, the VM should have full disk and network functionality and be ready for use.